Core 2

An intermediate routine designed to increase flexibility in your lower back, hips, and core.

Exercise Overview

Exercise Instructions

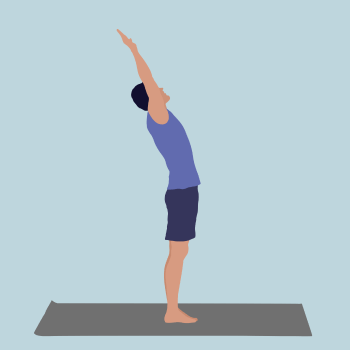
Upward Salute demonstration

1. Upward Salute

Instructions

  • Start from a standing position with your feet hip-width apart and your arms at your sides.
  • Slowly sweep your arms out and up over your head.
  • Keep your hands shoulder-width apart and reach toward the ceiling.
  • Relax your shoulders and look slightly upward.

Tips

  • Ground your feet firmly into the floor and distribute your weight evenly between your feet.
  • Engage your core muscles to avoid arching your lower back.

Modifications

  • For less intensity, place your hands behind your head or on your hips.

Benefits

  • Spine, Upper Back, Obliques, Shoulders, Chest, Lats, Abdomen
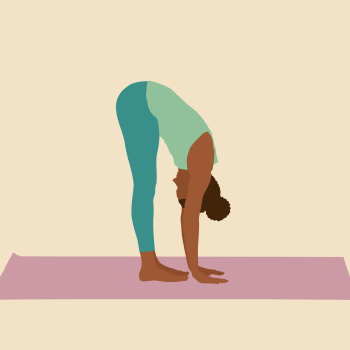
Toe Touch demonstration

2. Toe Touch

Instructions

  • Start from a standing position with your feet hip-width apart and your arms at your sides.
  • Keeping your back straight, hinge at your hips to bend forward, lowering your upper body toward your legs.
  • Relax your head, neck, and arms and try to place your palms on the floor.

Tips

  • Focus on lengthening your spine as you fold forward.
  • Keep your legs straight but not locked.

Modifications

  • If you can't reach the floor, place your hands on your shins or thighs.

Benefits

  • Calves, Hamstrings, Lower Back, Glutes
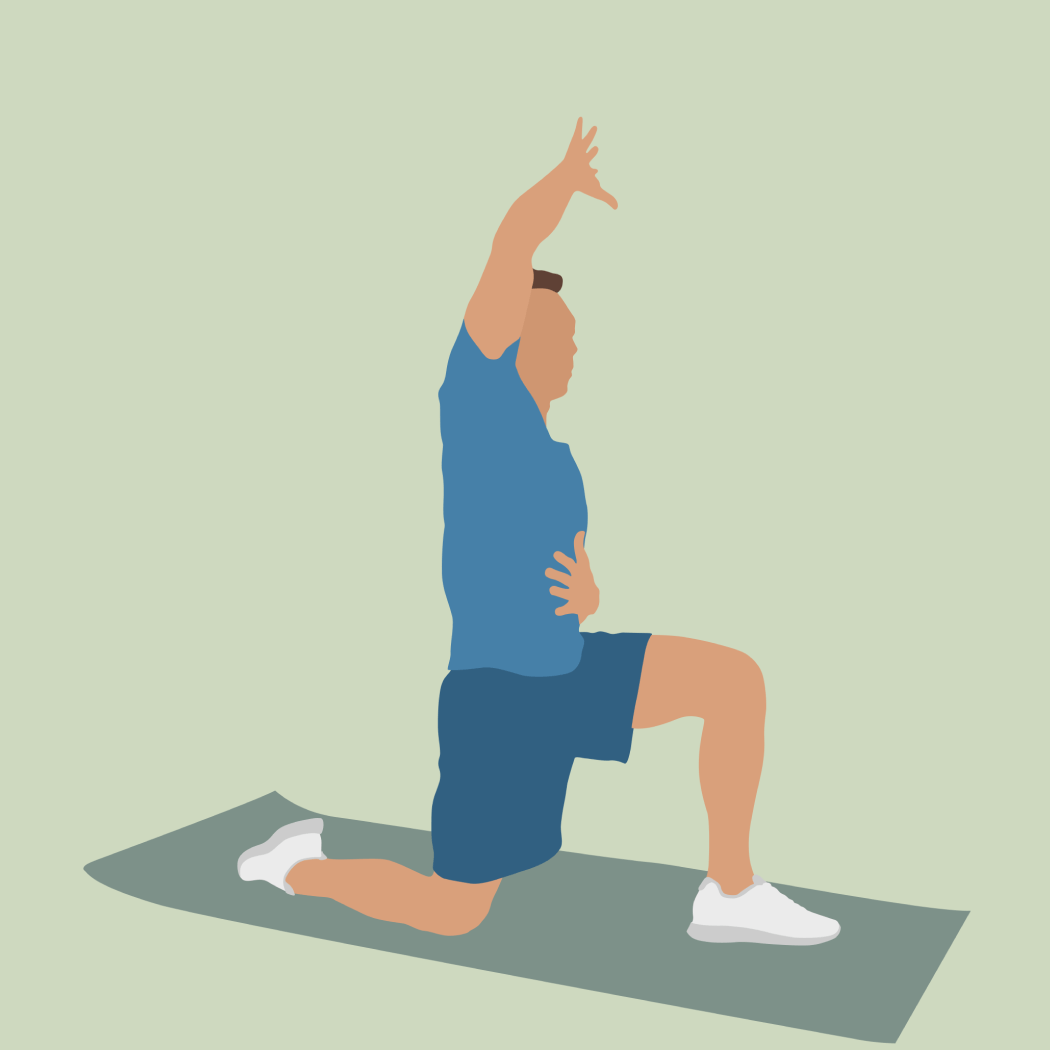
Kneeling Psoas demonstration

3. Kneeling Psoas

Instructions

  • Start from a kneeling position with your knees hip-width apart and your arms at your sides.
  • Step forward with one leg to place your foot on the floor in front of you, forming a 90-degree angle with both knees.
  • Raise your opposite arm above your head and place your other hand on your hip.
  • Press your hips forward while reaching up and over with your raised arm.

Tips

  • Align your front knee directly above your ankle.

Modifications

  • If you have knee pain, place a cushion under your back knee for support.

Benefits

  • Psoas, IT Band, Obliques, Hips, Quadriceps, Lower Back, Lats
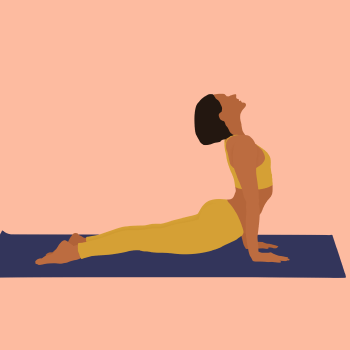
Upward Dog demonstration

4. Upward Dog

Instructions

  • Start lying on your stomach with your legs extended and your hands under your shoulders.
  • Press your palms into the floor, straightening your arms to lift your upper body and legs off the floor.
  • Lift your chest, relax your shoulders, and look slightly upward.

Tips

  • Only the tops of your feet and your palms should be touching the floor.
  • Keep your arms straight but avoid locking your elbows.

Modifications

  • For less intensity, keep your thighs on the floor.

Benefits

  • Psoas, Spine, Chest, Abdomen
Child's Pose demonstration

5. Child's Pose

Instructions

  • Start on your hands and knees in a tabletop position.
  • Widen your knees and bring your big toes together so they're touching.
  • Sit back on your heels, then reach forward with your hands and lower your chest toward the floor.
  • Relax your hips and rest your forehead on the floor.

Tips

  • Walk your fingertips forward to increase the stretch.
  • Allow your chest to sink towards the floor.

Modifications

  • For less intensity, don't spread your knees as wide.
  • If your forehead doesn't reach the floor, rest it on a block or folded blanket.

Benefits

  • Feet, Shins, Shoulders, Hips, Lower Back, Ankles
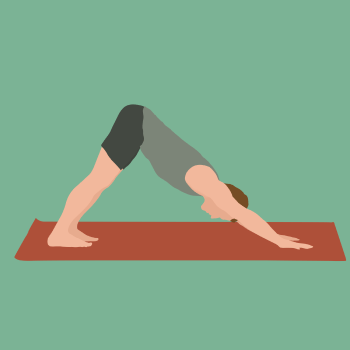
Downward Dog demonstration

6. Downward Dog

Instructions

  • Start on your hands and knees in a tabletop position.
  • Tuck your toes under, press your palms into the floor, and straighten your arms and legs to lift your hips up and back.
  • Push your chest toward your thighs and your heels toward the floor.

Tips

  • Relax your shoulders and let your head hang between your arms.
  • Distribute your weight evenly between your hands and feet.
  • Keep a slight bend in your knees to avoid hyperextension

Modifications

  • For less intensity, bend your knees more or place your hands on the edge of a chair.
  • To reduce pressure on your wrists, place your forearms on the floor or use a block under your hands.

Benefits

  • Calves, Shoulders, Hamstrings, Lower Back, Glutes
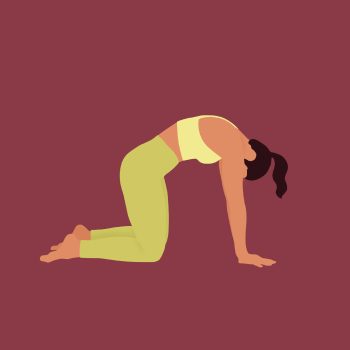
Cat Cow demonstration

7. Cat Cow

Instructions

  • Start on your hands and knees in the tabletop position.
  • Align your wrists under your shoulders and your knees under your hips.
  • Inhale, dropping your belly towards the floor and arching your back, and lifting your chin and chest to look up toward the ceiling.
  • Exhale, drawing your belly up toward your spine and rounding your back, and tucking your chin to your chest.

Tips

  • Move slowly between the poses, coordinating each movement with your breath.

Modifications

  • If you have neck issues, keep your head in a neutral position rather than lifting and tucking your chin.

Benefits

  • Spine, Neck, Upper Back, Lower Back, Abdomen
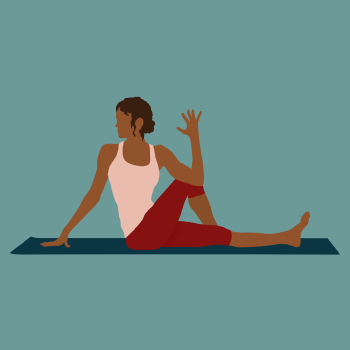
Seated Twist demonstration

8. Seated Twist

Instructions

  • Start on the floor in a seated position with your legs extended in front of you.
  • Cross one leg over the other, placing your foot on the floor outside of your opposite thigh.
  • Rotate your torso and place your elbow on the outside of your top knee and your other hand behind you for support.
  • Continue to rotate your torso and turn your head to look behind you.

Tips

  • Lengthen your spine and keep your back straight.

Benefits

  • Spine, IT Band, Upper Back, Obliques, Hips, Chest, Lower Back, Glutes
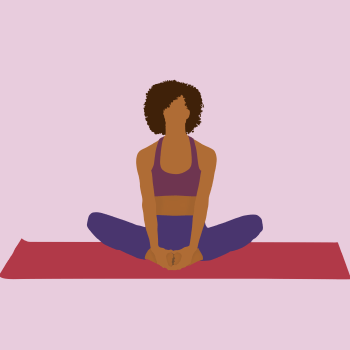
Butterfly demonstration

9. Butterfly

Instructions

  • Start on the floor in a seated position with your legs extended in front of you.
  • Bend your knees and bring the soles of your feet together, letting your knees fall out to the sides.
  • Hold your feet with your hands and gently press your knees towards the floor.

Tips

  • Pull your feet up and push your knees down with your elbows to deepen the stretch.
  • Keep your back straight and avoid rounding your spine.

Modifications

  • If your knees are high off the ground, place cushions under your thighs for support.
  • Sit on a folded blanket to raise your hips and improve comfort.

Benefits

  • Groin, Hips
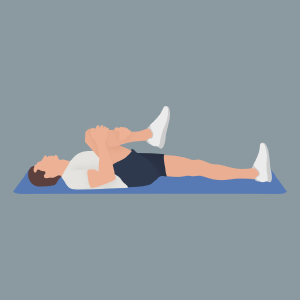
Single Knee-to-Chest demonstration

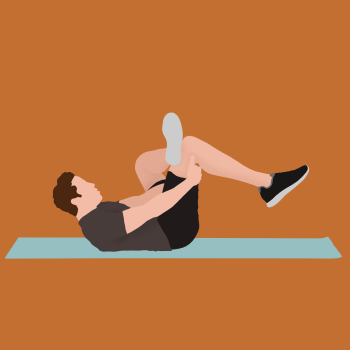
10. Single Knee-to-Chest

Instructions

  • Start lying on your back with your legs extended and your arms at your sides.
  • Bend one knee and draw it towards your chest, holding your shin with both hands.
  • Gently pull your knee closer to your chest while keeping your other leg straight.

Tips

  • Relax your head and neck on the floor.
  • Keep your hips square and your lower back pressed into the floor.

Modifications

  • If you can't reach your shin, pull on your thigh or use a towel around your knee.

Benefits

  • Hips, Hamstrings, Lower Back, Glutes
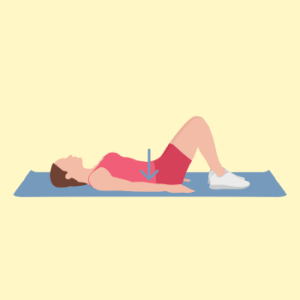
Pelvic Tilt Press demonstration

11. Pelvic Tilt Press

Instructions

  • Start lying on your back with your knees bent and your feet flat on the floor.
  • Engage your core to tilt your pelvis up and press your lower back into the floor.
  • Keep your arms at your sides with your palms on the floor and hold the position.

Tips

  • Imagine drawing your navel down towards your spine.
  • Keep your glutes relaxed; the movement should come from your core.

Modifications

  • If it's uncomfortable to lie on the floor, perform the exercise against a wall.

Benefits

  • Lower Back
Lying Figure Four demonstration

12. Lying Figure Four

Instructions

  • Start lying on your back with your knees bent and feet flat on the floor.
  • Cross one ankle over the opposite thigh, just above the knee.
  • Lift your bottom leg off the floor, bringing your knee towards your chest.
  • Reach forward and clasp your hands behind the thigh of your bottom leg.
  • Gently pull your leg towards your chest.

Tips

  • Keep your head and shoulders relaxed on the floor.
  • Keep your lower back pressed into the floor.

Modifications

  • If reaching behind your thigh is difficult, use a strap or towel to assist.
  • For a gentler stretch, keep your bottom foot on the floor.

Benefits

  • IT Band, Hips, Lower Back, Glutes
Spinal Twist demonstration

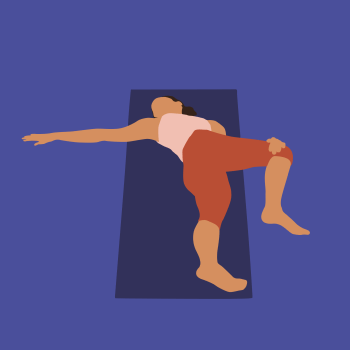
13. Spinal Twist

Instructions

  • Start lying on your back with your legs extended and your arms at your sides.
  • Bend one knee and place your foot flat on the floor.
  • Gently lower your bent knee across your body towards the opposite side, allowing your torso and hips to twist.
  • Place your opposite hand on the outside of your bent knee and extend your other arm out to the side.

Tips

  • Keep your shoulders flat on the floor.

Modifications

  • If the twist is too intense, place a cushion or block under your bent knee for support.

Benefits

  • Spine, IT Band, Upper Back, Obliques, Chest, Lower Back, Glutes
Knees-to-chest demonstration

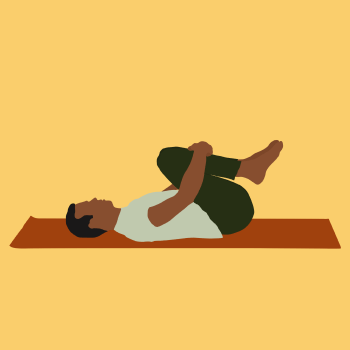
14. Knees-to-chest

Instructions

  • Start lying on your back with your legs extended and your arms at your sides.
  • Bend your knees and draw them towards your chest.
  • Wrap your arms around your shins and gently pull them closer to your chest.

Tips

  • Relax your head and neck on the floor.
  • Keep your lower back pressed into the floor.

Modifications

  • If you can't reach your shins, wrap your arms behind your thighs.

Benefits

  • Hips, Hamstrings, Lower Back, Glutes
Happy Baby demonstration

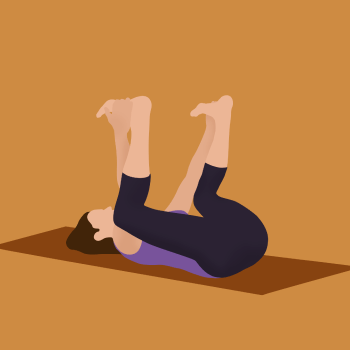
15. Happy Baby

Instructions

  • Start lying on your back with your knees bent and feet flat on the floor.
  • Lift your feet off the floor to bring your knees towards your armpits.
  • Grasp the outer edges of your feet with your hands and gently pull your knees towards the floor.

Tips

  • Keep your lower back pressed into the floor.
  • Relax your shoulders and neck.

Modifications

  • If you can't reach your feet, hold onto your ankles or calves instead.

Benefits

  • Groin, Hips, Hamstrings, Lower Back, Glutes