Front Splits Strength

Utilize isometric and calisthenic exercises to build supportive strength, ensuring safer and more controlled transitions into front splits.

Exercise Overview

Exercise Instructions

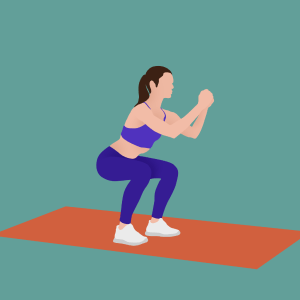
Squat Hold demonstration

1. Squat Hold

Instructions

  • Start from a standing position with your feet shoulder-width apart and your toes pointed slightly outward.
  • Lower your hips back and down as if sitting into a chair, keeping your weight on your heels.
  • Keep your chest lifted and your back straight and hold the position.

Tips

  • Aim to lower your hips until your thighs are parallel to the floor.
  • Keep your knees in line with your toes.

Modifications

  • For less intensity, perform the exercise with a smaller range of motion.

Benefits

  • Calves, Hamstrings, Quadriceps, Glutes
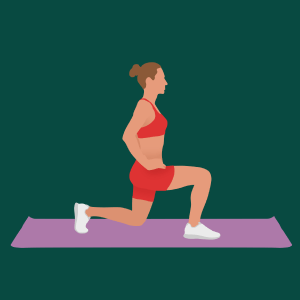
Split Lunge Hold demonstration

2. Split Lunge Hold

Instructions

  • Start from a standing position with your feet hip-width apart and your hands on your hips.
  • Step one foot back, lowering your back knee towards the floor while keeping it off the ground.
  • Keep both knees at 90 degree angles and hold the position.

Tips

  • Keep your chest lifted and your back straight.
  • Align your front knee above your ankle.

Modifications

  • For less intensity, keep your back knee further from the floor.
  • Use a chair or wall for balance support if needed.

Benefits

  • Calves, Hips, Hamstrings, Quadriceps, Glutes
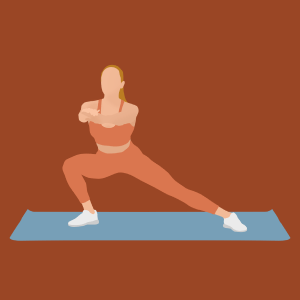
Side Lunge Hold demonstration

3. Side Lunge Hold

Instructions

  • Start from a standing position with your feet wide and your toes pointed forward.
  • Shift your weight to one side, bending your knee to lower your hips toward your foot until your thigh is parallel to the floor.
  • Keep your opposite leg straight and hold the position.

Tips

  • Keep your chest lifted and your back straight.
  • Keep your bent knee in line with your toes.

Modifications

  • For less intensity, perform the exercise with a smaller range of motion.

Benefits

  • Calves, Hips, Hamstrings, Quadriceps, Glutes
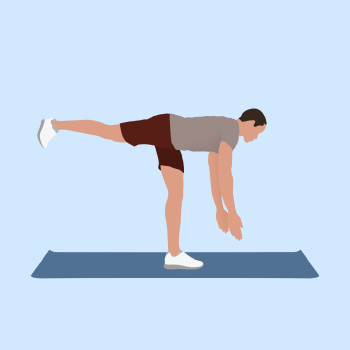
Single Leg Deadlift demonstration

4. Single Leg Deadlift

Instructions

  • Start from a standing position with your feet hip-width apart and your arms at your sides.
  • Shift your weight to one foot and raise your other foot slightly off the floor behind you.
  • Hinge at your hips, lowering your torso forward while simultaneously lifting your leg behind you.
  • Keep a slight bend in your standing leg and let your arms hang naturally.

Tips

  • Aim to lower your torso and lift your back leg until they are both parallel to the floor.
  • Keep your back straight so your body is in a straight line from head to toe.

Benefits

  • Feet, Hamstrings, Lower Back, Ankles, Glutes
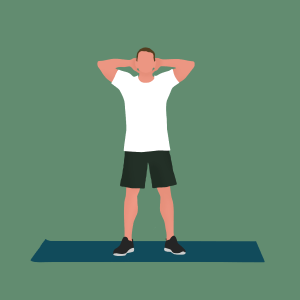
Air Squats demonstration

5. Air Squats

Instructions

  • Start from a standing position with your feet shoulder-width apart and your toes pointed slightly outward.
  • Place your hands behind your head or folded in front of your chest.
  • Lower your hips back and down as if sitting into a chair, keeping your chest up and your weight on your heels.
  • Push through your heels to stand back up to the starting position and repeat.

Tips

  • Aim to lower your hips until your thighs are parallel to the floor.
  • Keep your knees in line with your toes.

Modifications

  • If squatting deeply is difficult, perform the exercise with a smaller range of motion.

Benefits

  • Groin, Calves, Hips, Hamstrings, Quadriceps, Lower Back, Glutes
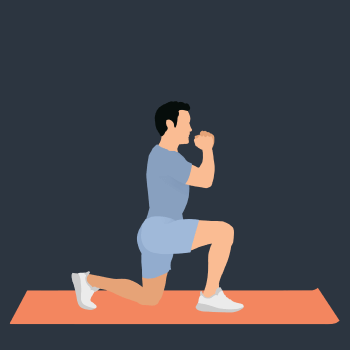
Split Squats demonstration

6. Split Squats

Instructions

  • Start from a standing position with one foot forward and the other foot stepped back into a split stance.
  • Bend both knees to lower your hips straight down, keeping your front knee aligned over your ankle and your back knee hovering just above the floor.
  • Push through your front heel to return to standing.
  • Repeat the movement and switch sides at the halfway point.

Tips

  • Engage your core to maintain balance and stability.
  • Keep your torso upright and avoid leaning forward.
  • Focus on controlled, steady movements to maximize effectiveness.

Modifications

  • Reduce the depth of the lunge if flexibility or strength is limited.
  • Hold onto a chair or wall for balance if needed.
  • Perform the exercise more slowly to ensure proper form.

Benefits

  • Calves, Hamstrings, Quadriceps, Core, Glutes
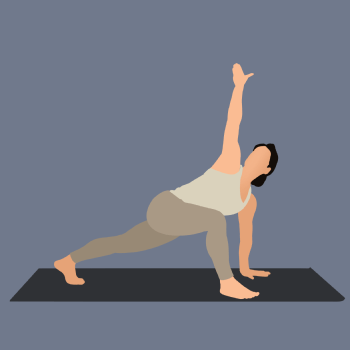
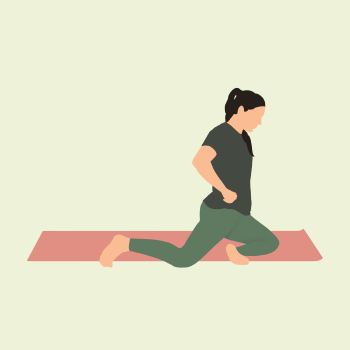
Runner's Lunge Twist demonstration

7. Runner's Lunge Twist

Instructions

  • Start in a plank position with your hands under your shoulders and your body in a straight line.
  • Step one foot forward to the outside of your hand, entering a runner's lunge position.
  • Twist your torso, reaching your opposite arm towards the ceiling.
  • Return your hand to the floor and step back into the plank, and switch sides at the halfway point.

Tips

  • Keep your hips low and your movements smooth for proper alignment.
  • Focus on opening through your chest as you twist.
  • Keep your back leg strong to maintain stability.

Modifications

  • Reduce the depth of the lunge if flexibility is limited.
  • Perform the movement more slowly to maintain balance.
  • Use yoga blocks under your hands for additional support.

Benefits

  • Shoulders, Hips, Chest, Core
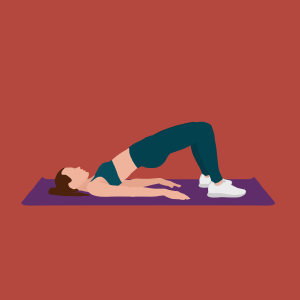
Bridge demonstration

8. Bridge

Instructions

  • Start lying on your back with your knees bent and your feet flat on the floor.
  • Engage your core and glutes to lift your hips off the floor, forming a straight line from your knees to your shoulders.
  • Keep your palms and shoulders pressed into the floor and hold the position.

Tips

  • Squeeze your glutes at the top of the movement.
  • Avoid arching your lower back; the movement should come from your hips and glutes.

Modifications

  • For less intensity, lift your hips only partially off the ground.
  • If you feel any neck strain, try placing a small, folded towel under your head for support.

Benefits

  • Hamstrings, Lower Back, Glutes
90/90 Hip Switch Extension demonstration

9. 90/90 Hip Switch Extension

Instructions

  • Start in a seated position on the floor with your knees bent and feet flat on the floor, positioned slightly wider than hip-width apart.
  • Keeping your hands in front of your chest, drop both knees to one side, creating a 90-degree angle with each leg.
  • Engage the muscles in your front leg to lift your hips off the floor.
  • Return to the seated position, lift your knees, and rotate them to the opposite side, repeating the extension on the other side dynamically.

Tips

  • Engage your core to maintain balance and control without using your hands.
  • Keep your chest lifted and your torso upright throughout the movement.
  • Move slowly and focus on proper form to avoid straining your hips or lower back.

Modifications

  • Reduce the range of motion if flexibility or balance is limited.
  • Place your hands behind you for additional support.
  • Sit on a cushion to elevate your hips for added comfort.

Benefits

  • Hips, Core, Glutes
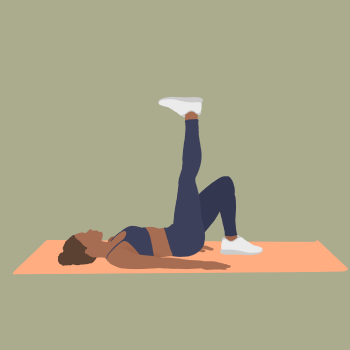
Single Leg Glute Bridges demonstration

10. Single Leg Glute Bridges

Instructions

  • Start lying on your back with one knee bent, foot flat on the floor, and the other leg extended straight up into the air.
  • Engage your glutes and lift your hips towards the ceiling, keeping your extended leg straight up.
  • Lower your hips back to the floor with control and repeat the movement.
  • Switch sides at the halfway point.

Tips

  • Focus on squeezing your glutes at the top of the movement.
  • Move smoothly and avoid arching your back.

Modifications

  • Keep both feet on the floor if balance is a challenge.
  • Reduce the range of motion if the exercise feels too intense.

Benefits

  • Hamstrings, Lower Back, Glutes